


Created using the p5.js library
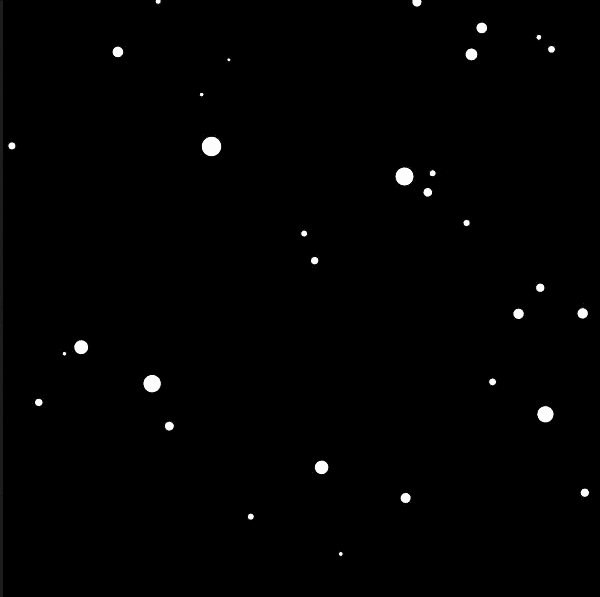
I am going to show you how to create a 3D effect on canvas using a library called p5.js. I watched some videos demonstrating the usage of this library and I found also this coding challenge (creating starfield) in Processing. I decided to rewrite it in JavaScript and then improve it slightly. Do you remember old Windows screensavers? One of them looked like this:
 old Windows screensaver
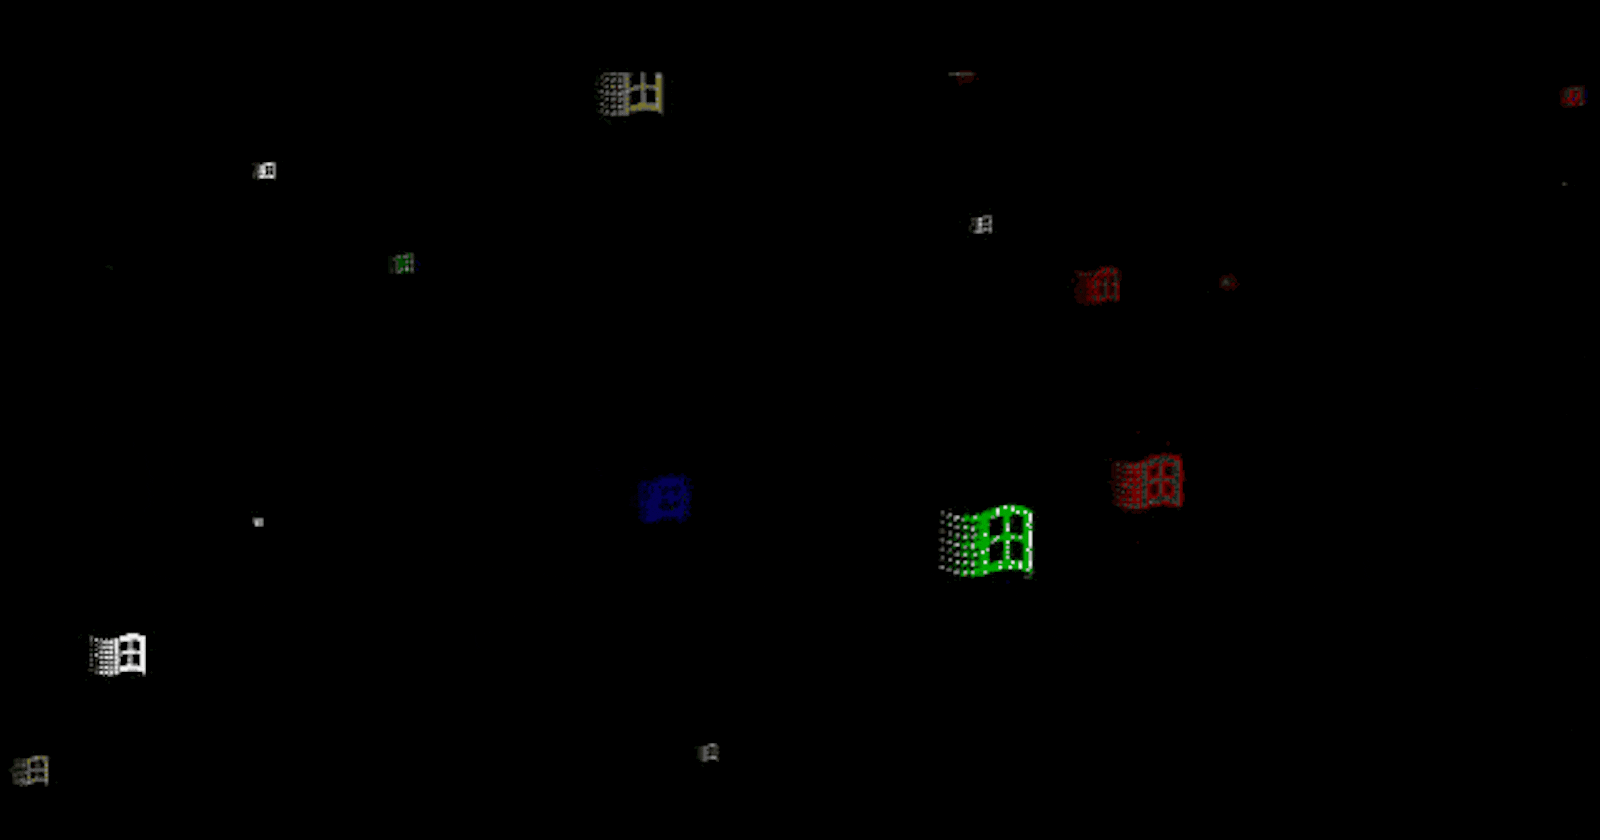
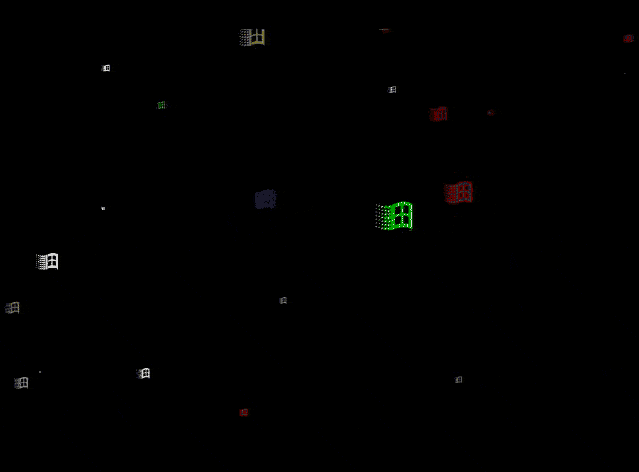
The animation above is based on Starfield Simulation, or Warp drive. Instead of ‘stars’ we can see flying windows. Let’s recreate this but with the latest Windows logo so the result would look like this.
**)](https://cdn-images-1.medium.com/max/2000/0*taxK663F-zq21l8Q.gif) flying Windows logo created in p5.js (Check out the DEMO)
flying Windows logo created in p5.js (Check out the DEMO)
P5.js
p5.js is a JavaScript library for creative coding, with a focus on making coding accessible and inclusive for artists, designers, educators, beginners, and anyone else!
It is JavaScript implementation of Processing, which is a flexible software sketchbook and a language for learning how to code within the context of the visual arts. It is very easy to start with, because there is also an online p5.js editor. When you open it, you will see just 3 files:
index.html
sketch.js
style.css
Index.html links the library and sketch.js is the file we are going to work with. It contains 2 main functions by default:
function setup() {
  createCanvas(400, 400);
}

function draw() {
  background(220);
}
setup() is used for initialization and runs only once, while draw() function runs repeatedly and is used for animation. That’s all you need to know for now about p5.js.
Warp drive with Windows simulation
Warp drive basically means travelling faster-than-light, and you might be familiar with it from the Star Trek series. Instead of stars we want to create Windows, so let’s create a few variables first.
let windows = [];        // array of windows
let windowsNum = 500;    // number of windows we want to display
let speed = 4;           // speed of travelling
Then in the setup() function we can iterate through the number of windows and fill the array with a newly created Window objects.
function setup() {
  createCanvas(600, 600);

  for(let i=0; i < windowsNum; i++) {
    windows[i] = new Window();
  }
}
How does Window object look like? Let’s use class to define it
class Window {
  // initializing an object using a constructor method
  constructor() {
    this.x = random(-width, width);
    this.y = random(-height, height);
    this.z = random(width);
    this.pz = this.z;
  }
  update() {}
  show() {}
}
Window has several properties: x, y, z (coordinates) and pz , which is the previous z location. width and height are system variables defining the canvas size.
**Random()** function returns a random floating-point number, and we use it to randomly redistribute our windows on the screen (x , y , z).
update()
There is also update() function we can take a look at:
update() {
  this.z = this.z - speed;

  if (this.z < 1) {
    this.z = width/2;
    this.x = random(-width, width);
    this.y = random(-height, height);
    this.pz = this.z;
  }
}
Just a few things going on here.
In canvas, ‘x’ and ‘y’ start at the top left corner.
](https://cdn-images-1.medium.com/max/2000/0*kNcolXnzdfRH_-MT.png)
We have also the ‘z’ coordinate even though we don’t have WEBGL (3D) mode enabled. We want to simulate movement on that axis though. In the update() function we update that coordinate by subtracting speed so the objects appear to come towards us.
this.z = this.z - speed;
If ‘z’ is less than 1, the objects are out of the canvas and therefore we reset the coordinates.
show()
In the show() function we have:
show() {
  let sx = map(this.x/this.z, 0, 1, 0, width/2);
  let sy = map(this.y/this.z, 0, 1, 0, height/2);

  // I use the z value to increase the object size between a range from 4 to 26.
  let r = map(this.z, 0, width/2, 26, 4);
  ellipse(sx, sy, r, r);

  this.pz = this.z;
}
Daniel Shiffman in his source code explain the above in the comments:
with theese “map”, I get the new star positions the division x / z get a number between 0 and a very high number, we map this number (proportionally to a range of 0–1), inside a range of 0 — width/2. In this way we are sure the new coordinates “sx” and “sy” move faster at each frame and which they finish their travel outside of the canvas
I’d like to point out 2 things here:
- **map()** function re-maps a number from one range to another.
map(value, start1, stop1, start2, stop2)
- the divisions x / z and y / z represent the equation of weak perspective projection. In other words, transforming world-space coordinates (x,y,z) to screen-space (u,v)
u = x / z;
v = y / z;
](https://cdn-images-1.medium.com/max/2000/0*jp0lZTZXi47O9cqI.png)
draw()
Now we can update the main draw() function:
function draw() {
  background(0);
  // moving the center from the top left corner to the center of the canvas.
  translate(width/2, height/2);

  for(let i=0; i < windows.length; i++) {
    windows[i].update();
    windows[i].show();
  }
}
We iterate through the windows array and call the functions we defined before on each object. You should see this:
Almost there! But we want windows!
Loading images
I downloaded the Windows logo and prepared several color variants:
 Windows logos
We need to create a preload() function and create a new variable imgs
let imgs = [];

function preload() {
  for (let i = 0; i < 6; i++) {
    imgs[i] = loadImage('microsoft-windows-' + i + '.png');
  }
}
I prepared 5 images, and gave them the same name with the number suffix, so it’s easy to load them in a loop. Now we can add another property to constructor, where we can use again the random function. We are passing an array there, so a random image variant will be picked.
constructor() {
  this.x = random(-width, width);
  this.y = random(-height, height);
  this.z = random(width);
  this.pz = this.z;
  this.img = random(imgs);
}
Note: Instead of creating several images, I tried changing the color of the image with a tint() function, but the performance suffered greatly.
Then we just replace ellipse() in a show() function with the image() like this:
image(**this.img**, sx, sy, r, r);
Yay! We recreated the Windows screensaver. I feel like something is missing though.
Loading (error) sound
I wanted to play the Windows error sound in a loop as if the windows flying out of the screen were making it. P5 has an additional library called p5.sound.js that we can use for that.
We just have to update the preload function like this:
let sound, soundLoop;

function preload() {
  for (let i = 0; i < 6; i++) {
   imgs[i] = loadImage('microsoft-windows-' + i + '.png');
  }

  soundFormats('mp3', 'ogg');
  sound = loadSound('error.mp3');
}
And also update the main setup() function:
function setup() {
  createCanvas(600, 600);

  let intervalInSeconds = 0.5;
  soundLoop = new p5.SoundLoop(onSoundLoop, intervalInSeconds);
  soundLoop.start();

  for(let i=0; i < windowsNum; i++) {
    windows[i] = new Window();
  }
}

function onSoundLoop(timeFromNow) {
  sound.play();
}
Well done, you should get this **RESULT**.
Thank you for reading! It's Miro's fault! Newsletter about web front-end technologiesmiro.substack.com