Flipbook animation reimagined
Do you like animations? I certainly do. It’s a pleasure to look at them and if you also want to have fun creating some, check out Looom. It is an iOS application and its tagline says — Flipbook animation reimagined. In this article I will show you how to use it and will cover pros and cons of this app.
Looom is all about looping animation with a smile. It was designed for professionals and beginners of any age, and is already being used by some influential indie animators.
I decided to try it this week and installed it on the iPad after I saw a few examples on Twitter. Below is an example from creative coder and generative artist Matt DesLauriers.
Quite simple, but very nice.
I am going to walk you through the interface of the app and show you all the features while creating this counting sheep animation (credits for the idea go to my awesome girlfriend). I hope you won’t fall asleep during this process. Here is the result:

Main screen
The UI is something really reimagined. It’s very slick, but after creating a new project it takes time to figure out how it really works. I even had to consult the user guide this time. Don’t worry, if you follow along, everything will be clear by the end of this article and you can unleash your creative powers on your next projects.
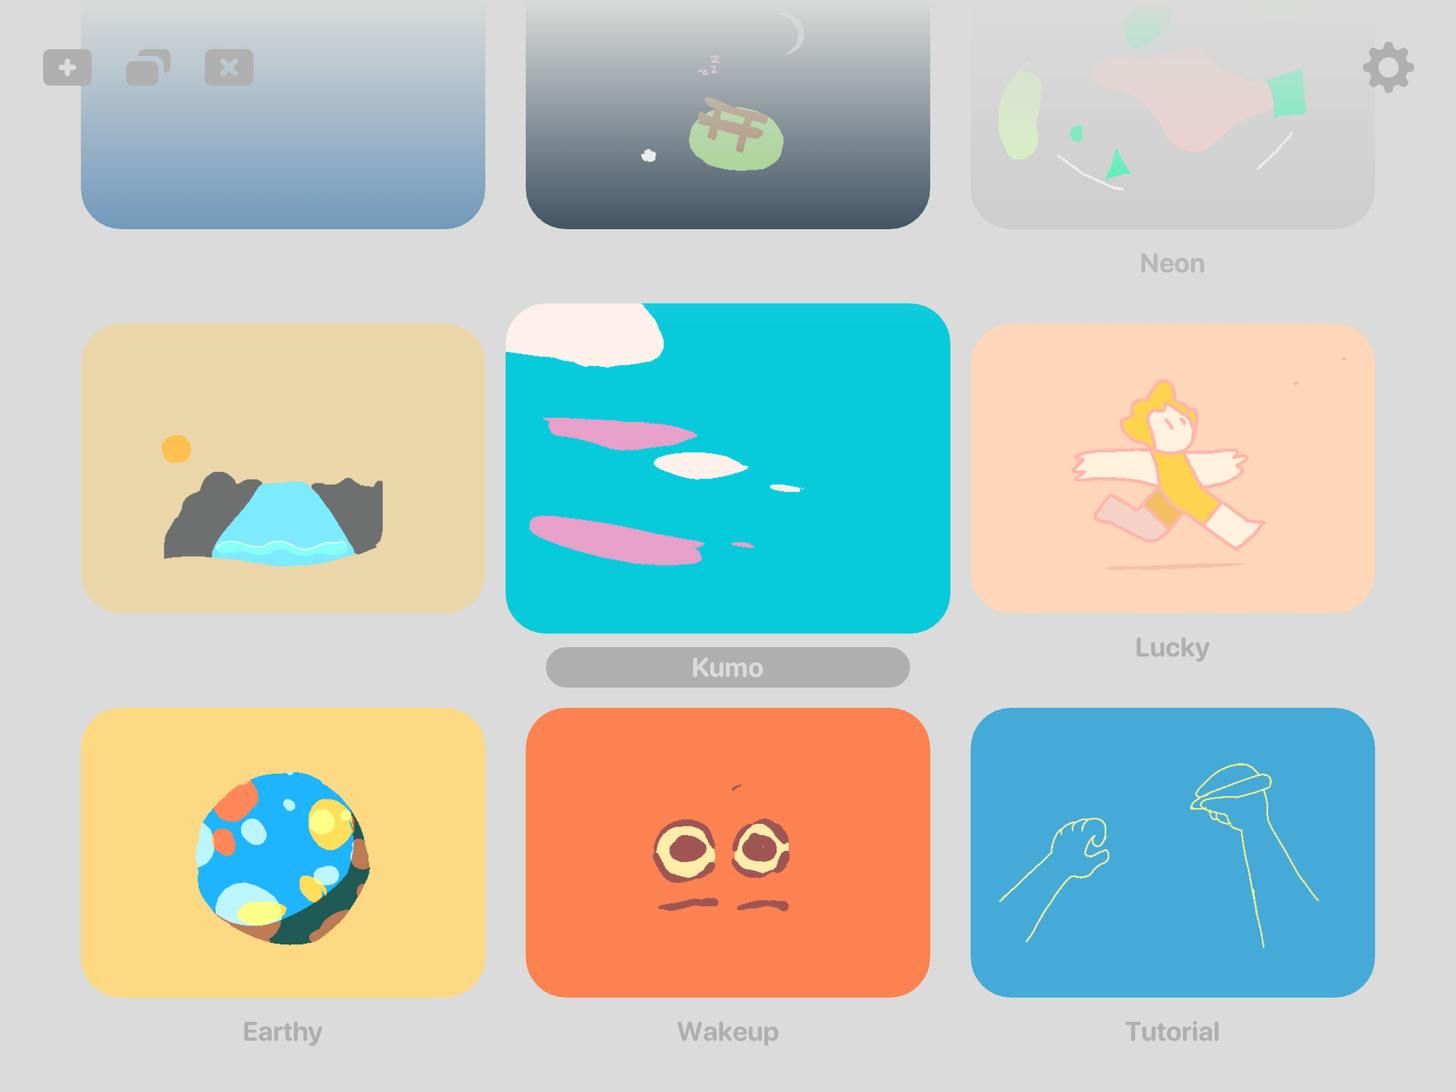 main screen
On the main screen we can see a list of project. In the top right corner we can see the Settings button.
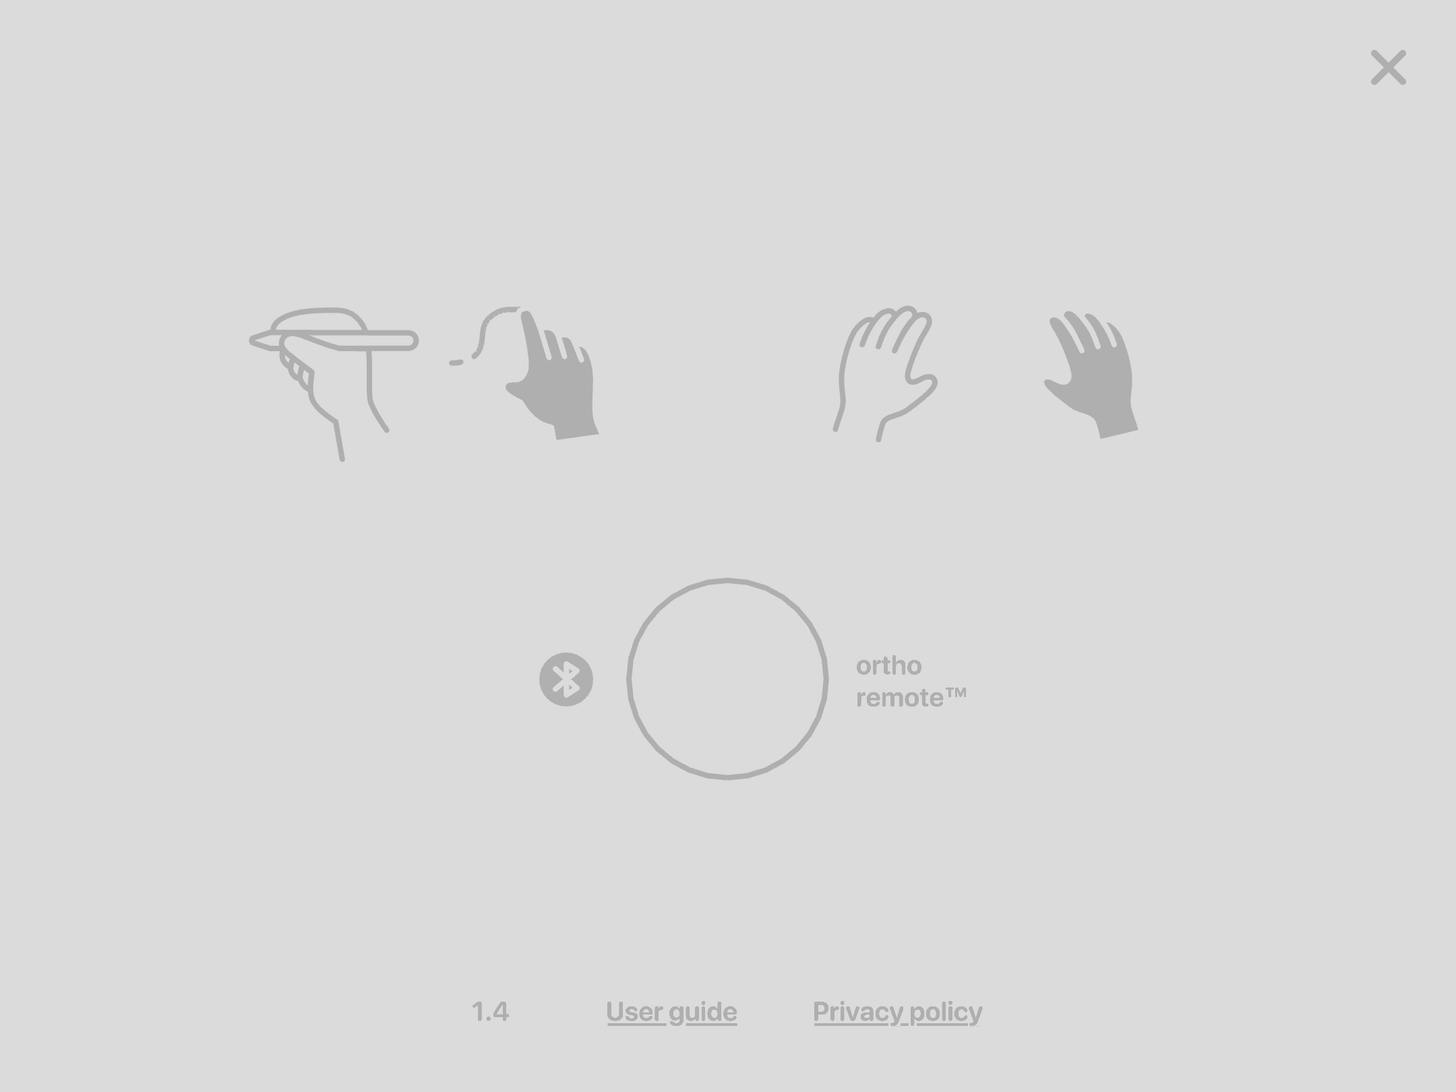 Settings
Here we have a few options. Are you a left or right handed person? Do you have an Apple pencil or you want to draw by hand? This is the initial setup.
*Note: I’ve tried an alternative to Apple pencil and it didn’t work, unlike with other apps, so for Loom I had to stick to hand drawing.*
Now that the main things are configured, let’s create a project.
On the main screen, tap ‘+’ icon in the top left corner.
Static scene
We can change the main background color in Weave edit mode. Press down the icon in the bottom left corner to enter the mode and change the color.
There are also threads, in which you can control parts of you animation (number of frames, fps, color, draw shapes). In Looom, we can add up to 5 threads maximum. In the Weave edit mode we can adjust the threads and do the following:
add (click + icon)
reorder (hold and move up/down)
duplicate (hold the thread and swipe right)
delete (hold the thread and move it up to delete icon)
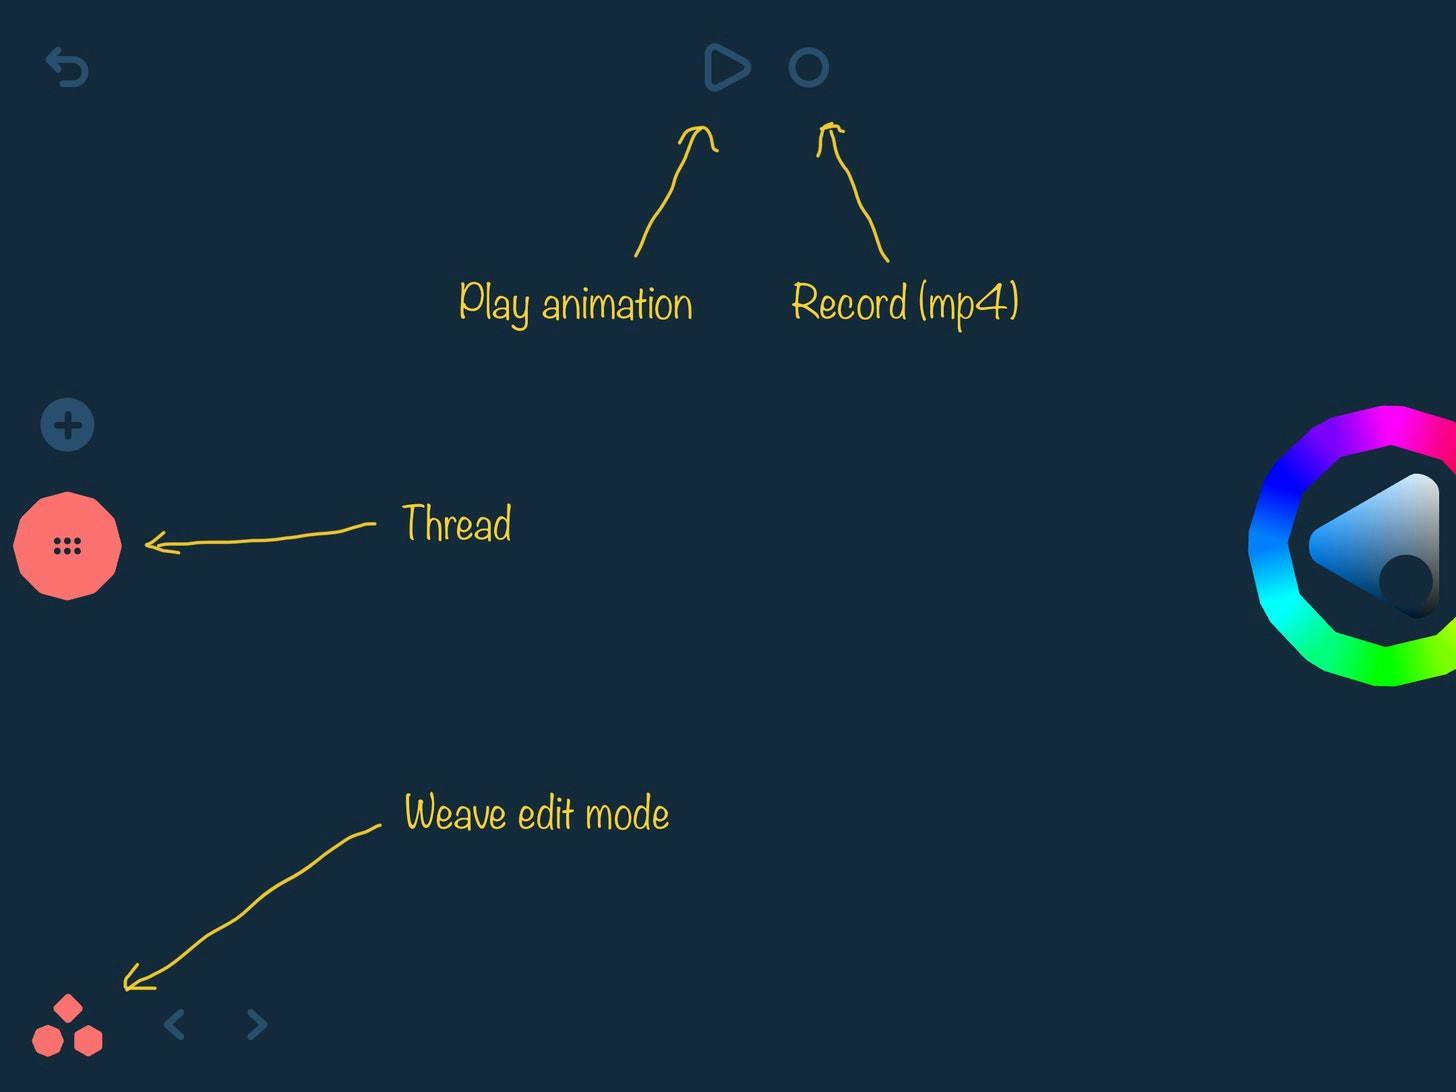
At the top of the screen we can see also the Play button and the Record button.
The first shape we are going to create is a grass field. It’s not going to be animated so we need only 1 frame. Press down the thread and set number of frames and FPS to 1. Then change the color and toggle between Line drawing and Fill brush. We want to fill the object and draw some kind of oval shape so we can select Fill brush tool.
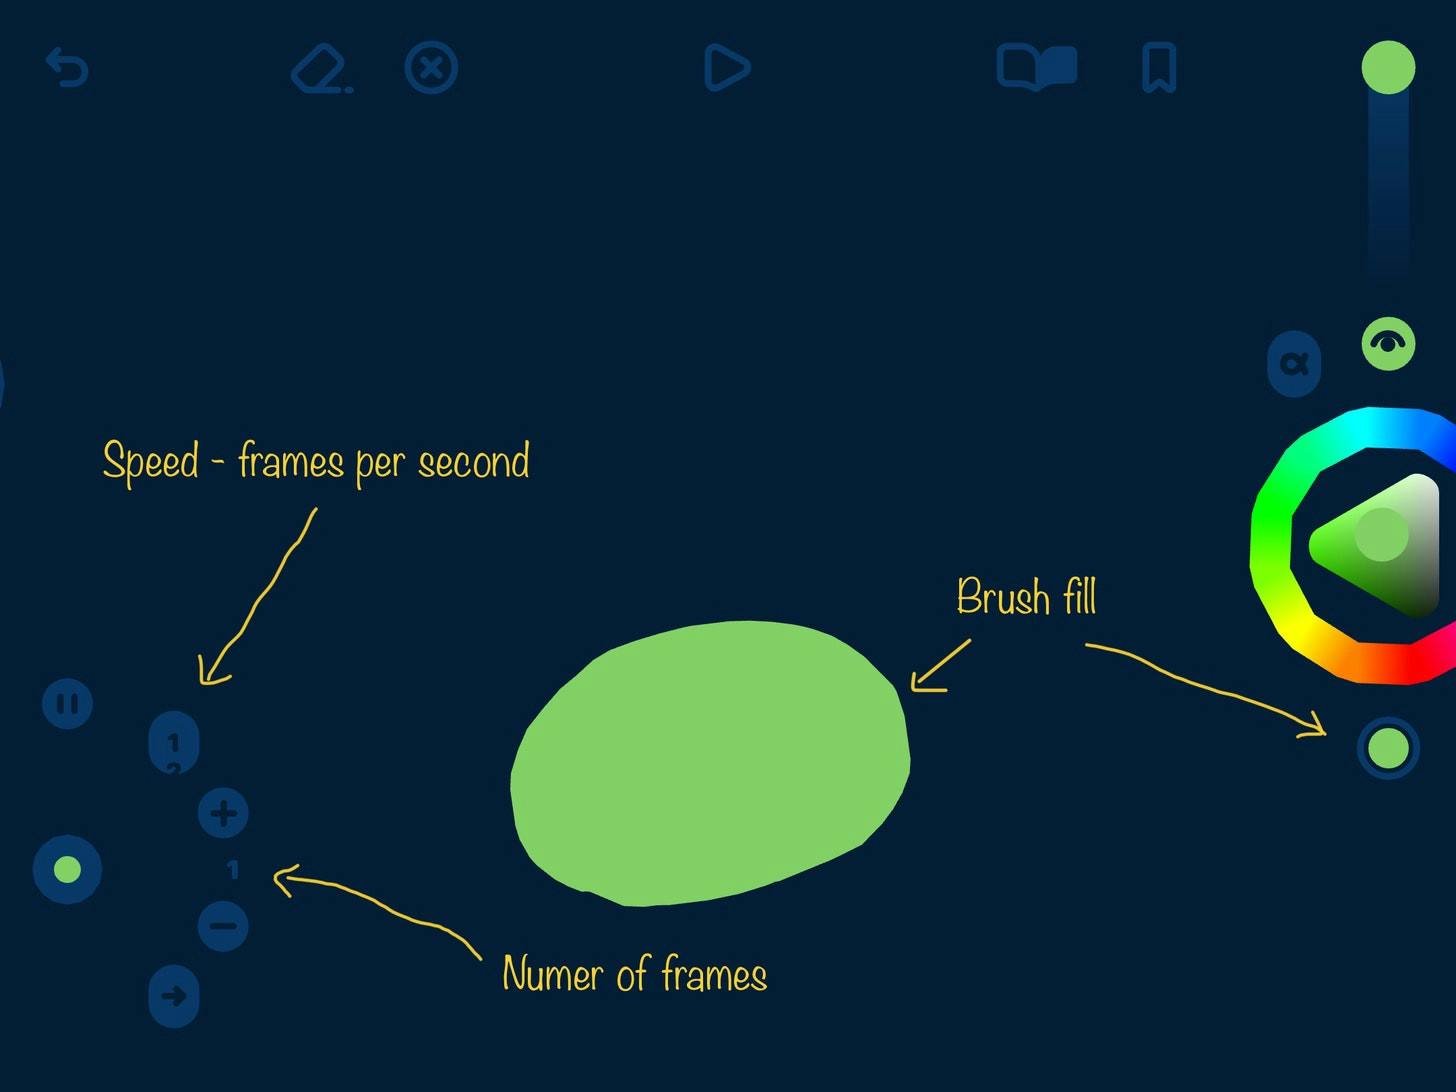
We can repeat this step to add more objects to the scene. Add 2 more threads and draw a fence and the moon. My drawing looks like this:
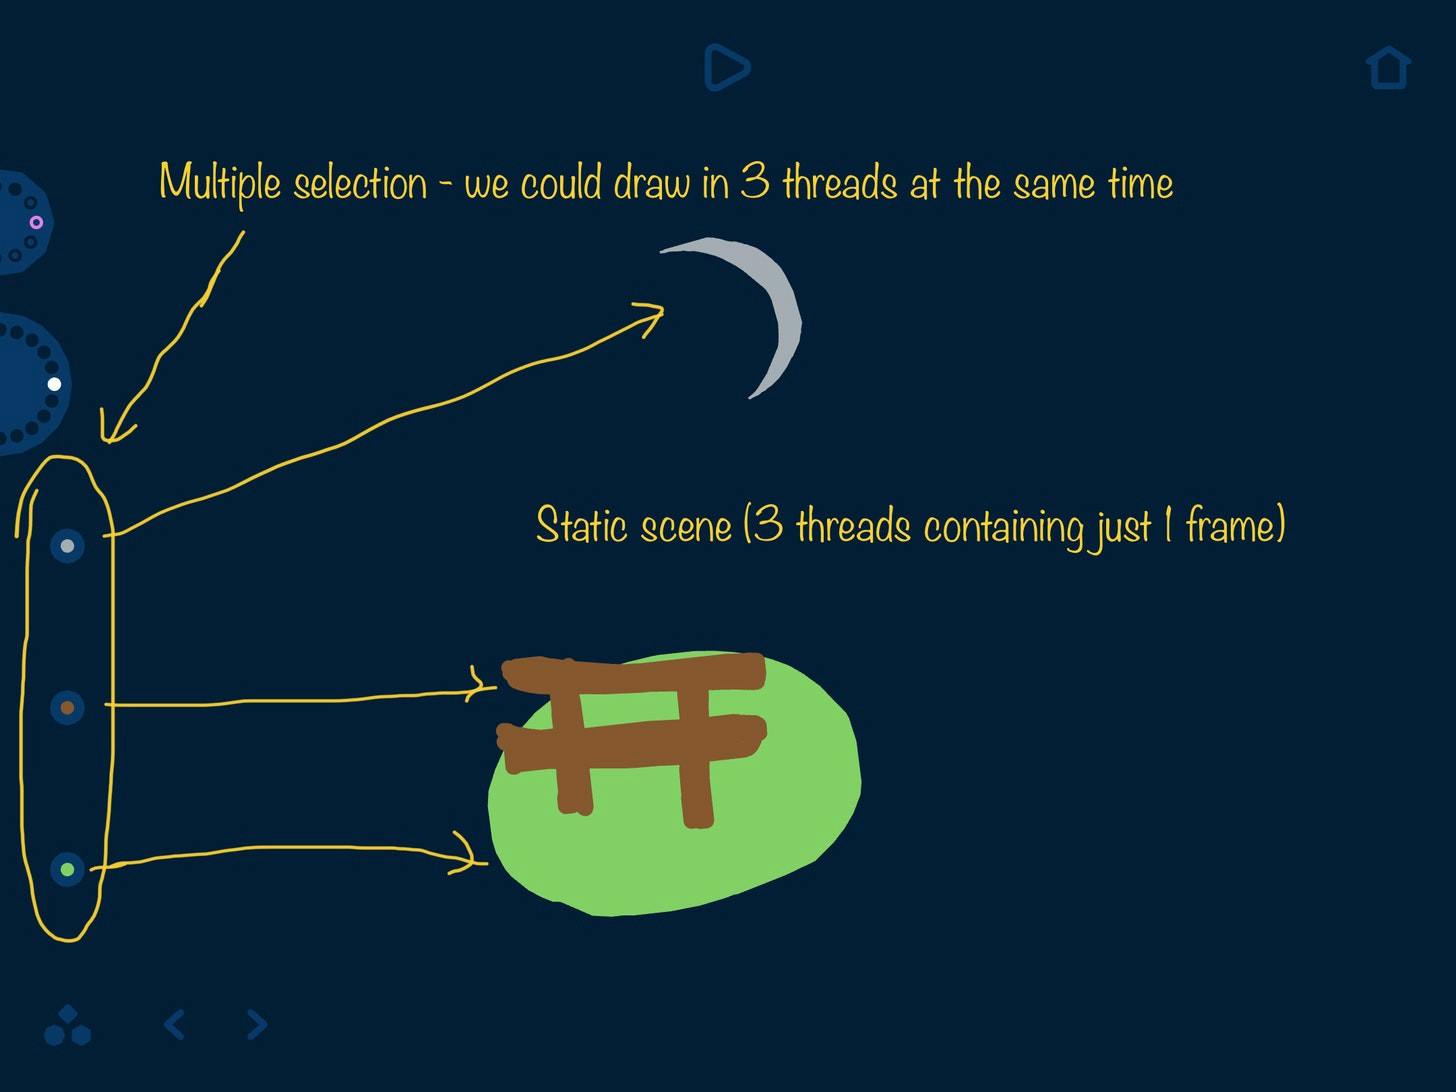
Notice that there’s an option to select multiple threads at once and draw in them. The static scene is ready, so we can move to the fun part — animation.
Animating objects
Another (4th) thread consists of 20 frames and I set the speed to 6. Play around with the numbers to achieve the best result. I started by drawing small clouds that could represent thoughts. I added one cloud (1st frame), stepped to the next frame (2nd) and drew another bigger cloud, then moved to another frame (3rd) and drew a sheep, and so on.
If you use the pencil, you can just swipe down/up with your finger to move between the frames. With hand drawing, there are arrows at the bottom that we have to click.
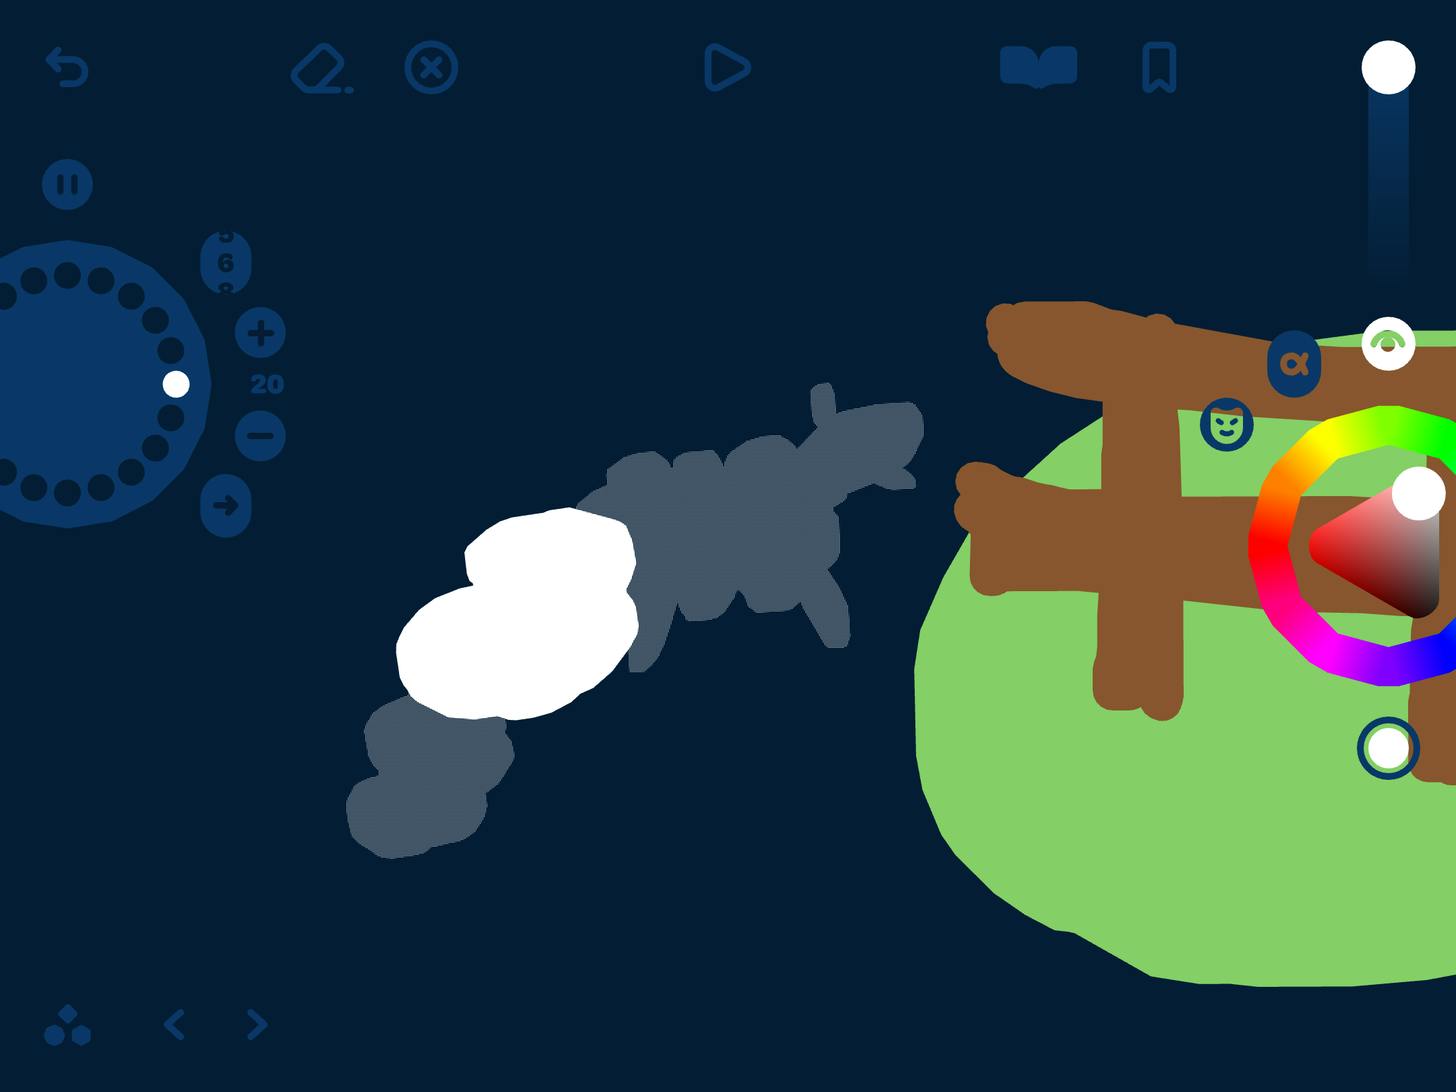
Unfortunately, we can use only 1 color in the thread. Changing color affect all objects within the thread. And again, I used just the Fill brush option to draw the sheep but you can toggle back to Line drawing. At any point, play the animation to see how it looks like. You can even draw while the loop is playing.
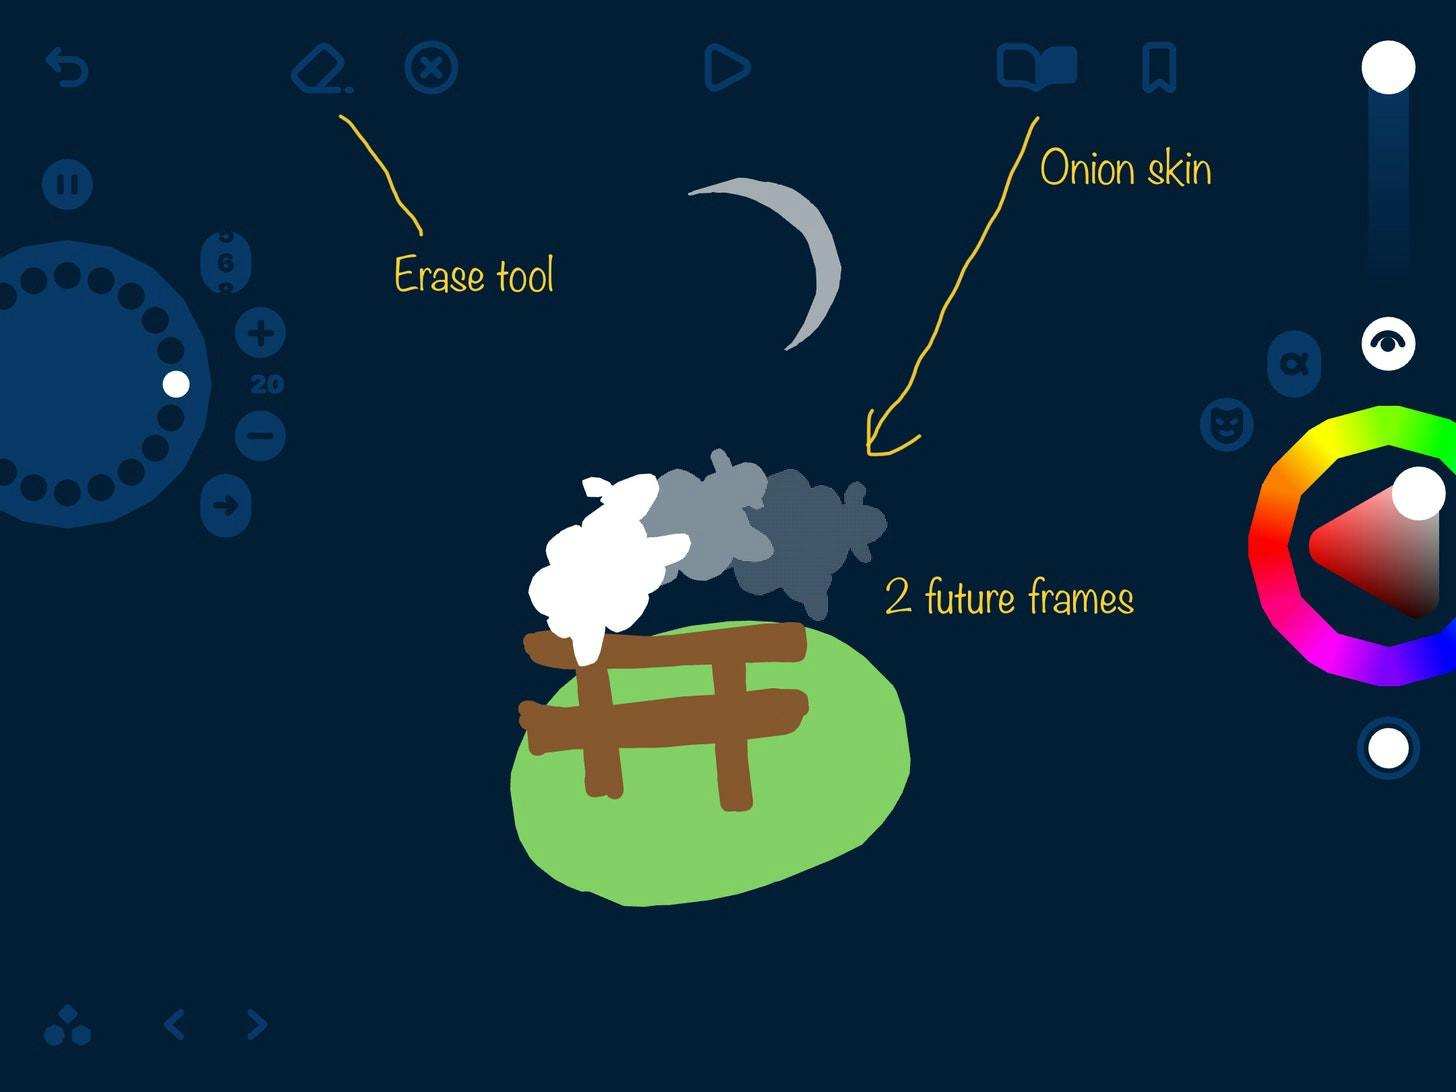
What if we make a mistake? We can go to the specific frame, click Erase tool and then click on the part we would like to erase. There’s also the Onion skin toggle (book icon), where we can switch between the past and future frames (or both)
In the last thread I used line drawing to draw zzZZzz animated at 6 frames per second and I set the color to pink.
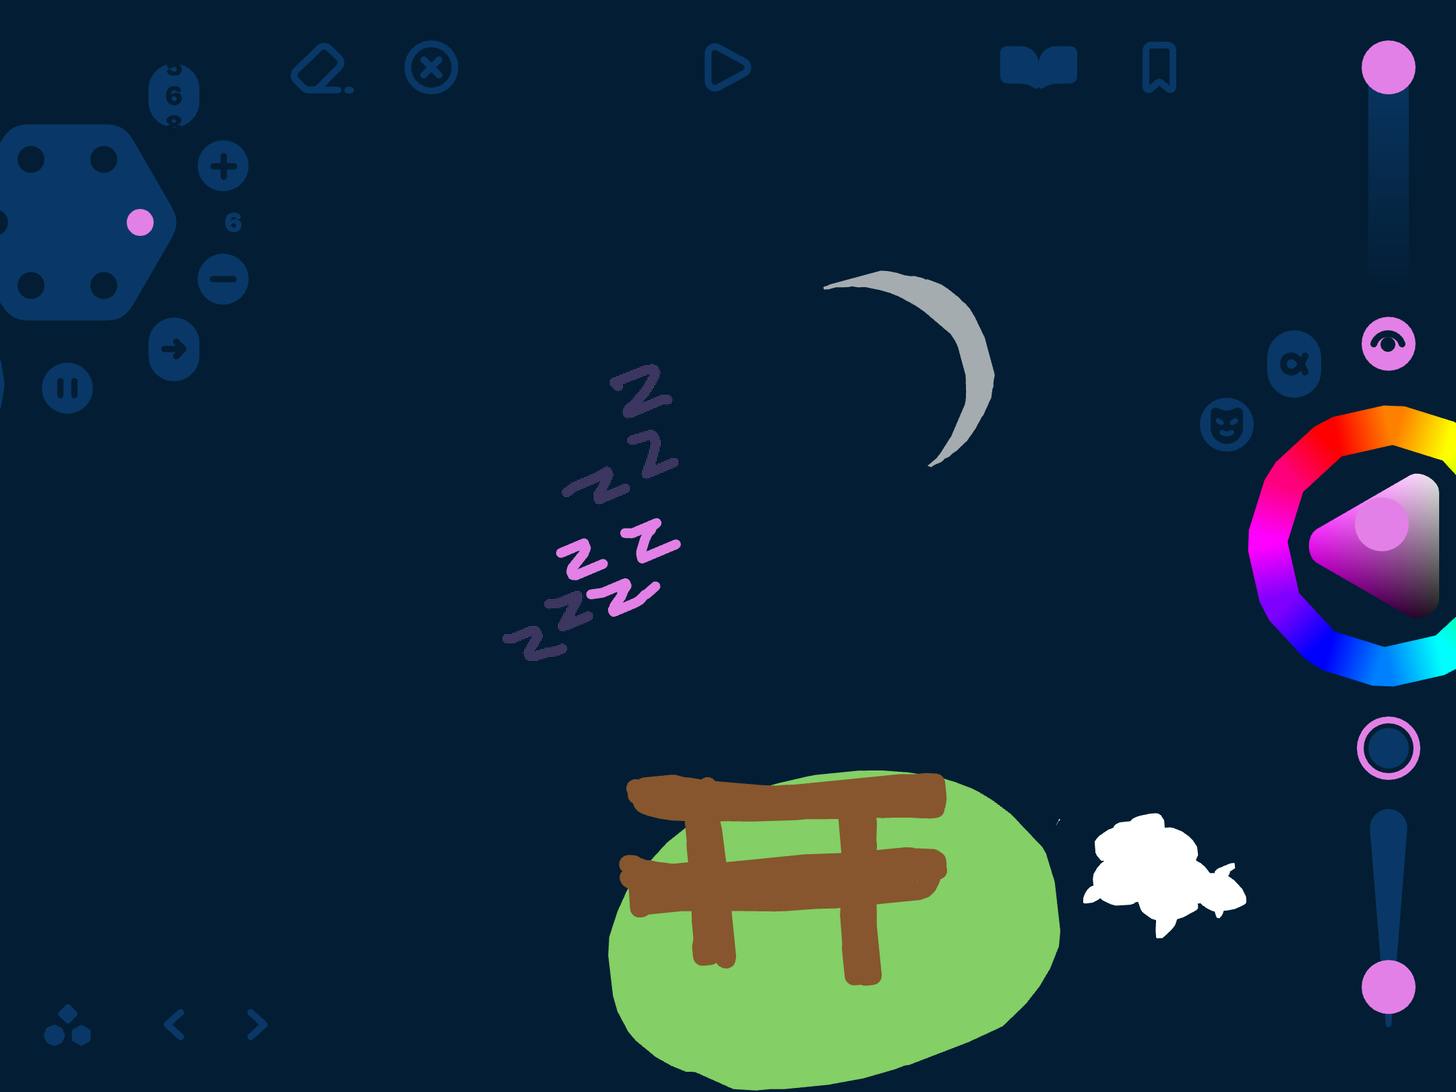
And that’s it. We can start counting the sheep and drift to sleep.
Export
There’s one more important thing to mention though. How do we export our creation? The whole thing is SVG so we could use it on the web or different types of software for editing animations.
We can see there’s only a Record button that we can click to record a video and save it then to the photo library or share it. That’s not ideal. To access the SVG file we need to connect your iPad to computer. Follow these steps for more details.
To post a gif at the beginning of this article, I had to convert the video first and faced some difficulties. I used this video to gif converter to keep the proper frame rate in place.
There’s also good news for the fans of web technologies. Matt DesLauriers is also working on the web renderer for Looom. Check out this Github repository — Looom tools and https://looom-tools.netlify.app/ where you can drag and drop your looom file and view it on the web.
Conclusion
Looom is fun and I’ll be playing with it a bit more. The UI is not very intuitive at the beginning so a walk-through of the controls right in the app would be very welcome I think. After you get the hang of it and understand how it works it’s really cool and fun for both adults and kids. There’s a lot of potential and we can already see it’s coming on the web too thanks to @mattdesl
Areas of improvement: It’s a pity there’s a limit for 5 threads and that we can’t change the color of the frames individually. Also it would be nice if we could move/reposition the frames that we draw and if editing was more advanced. It looks like you also have to have Apple pencil as my alternative didn’t work.
Check out Looom User guide if you need more help.
I hope you enjoyed it and would like to see your animations.
Bonus
Check out also mutsuacen.com where you can create some funky and wavy animations.

